
Screen recorder programs are always a great and necessary help for users who intend to create video demos, instructional video, presentations, application tutorials, etc. It’s almost not possible finish these tasks without a proper screen recorder. However, even when you are in an urgent need of screen recording, you should not panic and rush into payment. Take some time to do a small research and you will find there are plenty of choices out there. Here I’m going to recommend several screen recorder software I’ve personally used so that you can pick the one that suit you most.

Quick Overview: Best Screen Recorder Software
| Price | Simplicity | Capturing Features | Editing Features | Formats | Help & Support | Overall | |
|---|---|---|---|---|---|---|---|
| Free Screencast | Free |  (5 / 5) (5 / 5) | (5 / 5) |  (1 / 5) (1 / 5) |  (4.5 / 5) (4.5 / 5) | (5 / 5) | (4.5 / 5) |
| Ezvid | Free |  (3.5 / 5) (3.5 / 5) |  (3 / 5) (3 / 5) | (3.5 / 5) | (5 / 5) | (4.5 / 5) |  (4 / 5) (4 / 5) |
| Camtasia Studio | $249 | (4.5 / 5) |  (2.5 / 5) (2.5 / 5) | (4.5 / 5) | (5 / 5) | (5 / 5) | (5 / 5) |
| Webinaria | Free | (5 / 5) |  (2 / 5) (2 / 5) | (2 / 5) | (3 / 5) | (4 / 5) | (3.5 / 5) |
| Apowersoft (Online) | Free | (5 / 5) | (3.5 / 5) | (4.5 / 5) | (2 / 5) | (5 / 5) | (4 / 5) |
Best Screen Recorder Software
1. Free Screencast
Free Screencast is one of the earliest software installed in my computer. I’ve been using it for many years to record some instructional video for my clients, and friends. It basically covers all necessary functions to capture screen. It can record computer screen with sound, and capture video via the webcam and IP camera. The amazing part is to add some filter effects and overlay feature. Compared to image overlay, I prefer to use text overlay in my video as watermarks. The text overlay include time-lapse feature. Once I even used it to spy on my dog by creating time-lapse recording with my webcam in the night. There are many features and what I mentioned here are just basics to introduce you to how it works. You can step onto homepage to find out more.
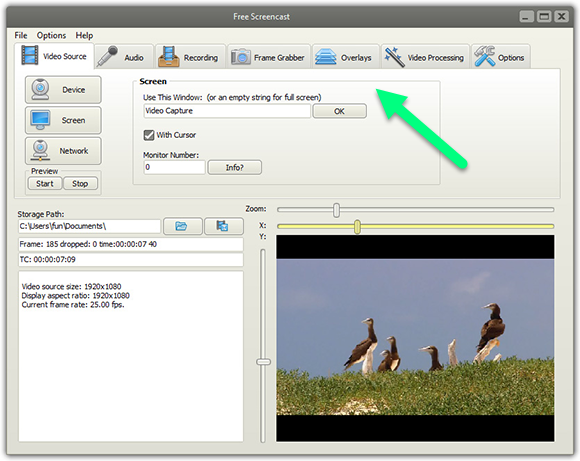
Here is a Quick Tutorial of how to use Free Screencast. Free Screencast can do a lot more when it comes to recording video:
2. Ezvid
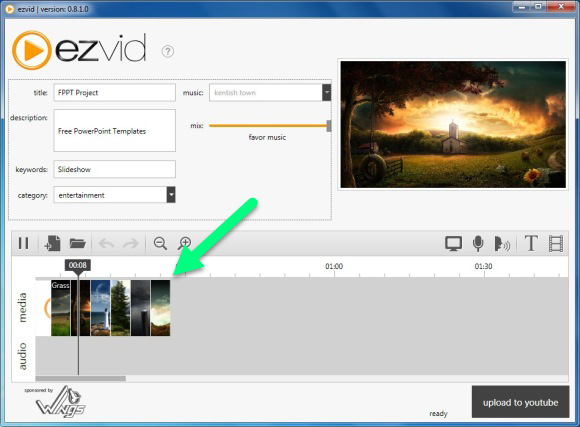
Ezvid is another simple screen capture software I use from now and then. It can also easily create demonstrative video with sound. It uses TTS to generate narration voice out of the given text. It can upload your video directly to YouTube. There are also many adjustable options. One drawback is that their website is poorly designed and full of irrelevant stuff. You may need to spend a bit more time on figuring out how it works.
3. Camtasia Studio
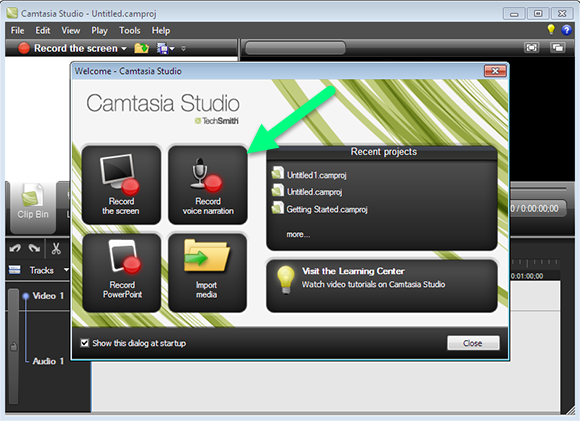
Camtasia Studio is more like a video production suite because it can record video, edit video, add transition effects, add subtitles and more. It uses multi-track editing to make video. As for screen recording, it is just like other common screen recorders, but it will output the recording as a project file instead of a playable video file. Then, you can input the project file into Camtasia Studio for further enhancement and rendering. It is much powerful than many of the screen recorders but it is not free – it takes $249 to purchase a single license and $99 to upgrade it to the latest version, if there’s any.
4. Webinaria
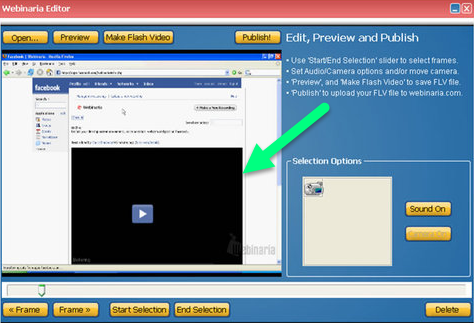
Webinaria, another screen capture app that can record your screen actions as well as sound. It is a very simple app with some basic screen recording settings. It does not provide more features than others but still, it earns its place by providing easy recording and YouTube uploading (Flash format only).
5. Apowersoft Free Online Screen Recorder
Sometimes I need to make a video immediately but the machine I got at hand is not equipped with the screen recorders I usually use, or for some reason they fail to launch or export video in a machine. That’s when I get things going with Apowersoft Free Online Screen Recorder. You just need to download a small launcher to start the recorder in your browser. It works fine except that there are less recording options to tweak. It is free to use. Meanwhile, it also provides a desktop version, which is not free. Yu need to pay $79.95 for a lifetime license for personal use and $159.9 for business.
How to Record Your Screen on Windows 11 With System Audio and Microphone
Windows 11 can record a screen in several ways, but the right setup depends on what you need to capture. A silent software demo, a narrated tutorial, and a meeting recap all need different audio choices. This guide shows a reliable local workflow for recording the full display, one window, or a selected region with computer sound and microphone narration.
Before you record
Close private chats, hide notification previews, and arrange the windows you plan to show. Record a short sample before a long session. The sample should include speech, a system sound, and a few seconds of motion so you can check volume balance and text clarity.
Connect the microphone or headset before opening the recorder. Windows applications sometimes keep an old device selection after a USB headset is unplugged. If a device is missing, reconnect it and refresh the device list.
1. Choose exactly what viewers should see
- Display records an entire monitor. Use it for workflows that move between several applications.
- Window records one chosen application window. It is the cleanest choice when you do not want the desktop or other apps in the video.
- Region records a rectangle you drag on screen. It works well for a browser panel, design canvas, or other fixed area.
Use the preview to verify the source before recording. For window capture, point at the window on the desktop and click it. For a region, drag the rectangle and check the displayed pixel dimensions. A stable capture area also produces smaller, easier-to-watch tutorials than an unnecessarily large desktop.
2. Set computer audio and microphone separately
System audio captures sound played by the computer, such as a browser video, presentation audio, or application alert. Microphone captures narration from the selected input device. Enable either one or both.
When both are enabled, start with system audio lower than the microphone. Spoken instructions should remain understandable when an application plays sound. Make a 15-second test and listen with ordinary speakers as well as headphones; a mix that sounds balanced on loud headphones may bury speech on laptop speakers.
If you need a silent recording, leave both boxes off. Disabled audio and camera devices are not requested by Free Screencast.
3. Pick practical video settings
For most tutorials, choose MP4 at 30 FPS. MP4 is broadly compatible, and 30 FPS keeps menus, typing, and normal pointer movement smooth without the storage cost of 60 FPS. Use 60 FPS for fast animation, games, or motion you intend to inspect frame by frame.
The Compression control runs from best quality toward smallest file. The fresh-install default of 65% is intended as a practical balance. The recorder shows an estimated file size in MB per minute. Treat it as a planning estimate rather than a promise: changing pages, video playback, noise, and other motion require more data than a nearly static slide.
4. Decide how recording starts and stops
The countdown choices are No countdown, 3 seconds, 5 seconds, and 10 seconds. A countdown only gives you time to place the pointer or switch focus before capture starts. It does not stop the recording.
Leave Stop automatically off when you want to stop manually. You can select Stop on the floating control bar or press Ctrl+Shift+R. Enable automatic stop only when you want a defined maximum duration, then enter the number of minutes.
5. Record, pause, annotate, and finish
Select Start recording. The main Free Screencast window minimizes before capture begins, which helps keep it out of the first frame. During full-screen or region recording, the floating controller provides Stop, Pause, Snapshot, and Draw actions. Global shortcuts remain available when the controller is hidden.
Drawing is intended for full-screen and region recordings. Window-only recording intentionally disables it because an overlay outside the selected application window cannot reliably become part of that source. When drawing is active, use Done to return to normal pointer interaction.
After you stop, the main window returns while the file is finalized. Wait for the saving state to finish before moving or renaming the video.
Troubleshooting missing or unbalanced audio
- No microphone: confirm the correct input device is selected and that Windows microphone privacy access allows desktop apps.
- No computer sound: enable System audio and choose the output device that is actually playing the sound.
- Echo: use headphones so the microphone does not record sound coming from speakers.
- Voice too quiet: raise microphone volume or lower system volume, then repeat the short test.
- Video too large: raise compression, use 30 FPS, or record a smaller region. See the screen-recording file-size guide.
Built-in Windows alternatives
Windows 11 also includes recording tools. Microsoft’s Xbox Game Bar instructions describe convenient app recording, while the official Snipping Tool guide includes video snips of a selected area. Free Screencast is useful when you want one local workflow that combines full-display, window, and region capture with separate audio choices, webcam overlay, drawing, scheduling, multiple output formats, and a recording library.
Start a local, watermark-free recording
Free Screencast 8.0.0 runs on 64-bit Windows 10 version 2004 or newer and Windows 11. It does not require an account and does not upload recordings.